|
|
Post by dubfreak1 on Sept 16, 2008 5:03:50 GMT -5
Haven't updated this lately, so here goes. People have been talking about motivation in other threads. Motivation was in short supply here last weekend also. I think it got washed away........... Anyway, still been working on cosmetic stuff. Here's a shot of the exterior as of 9-13-08: 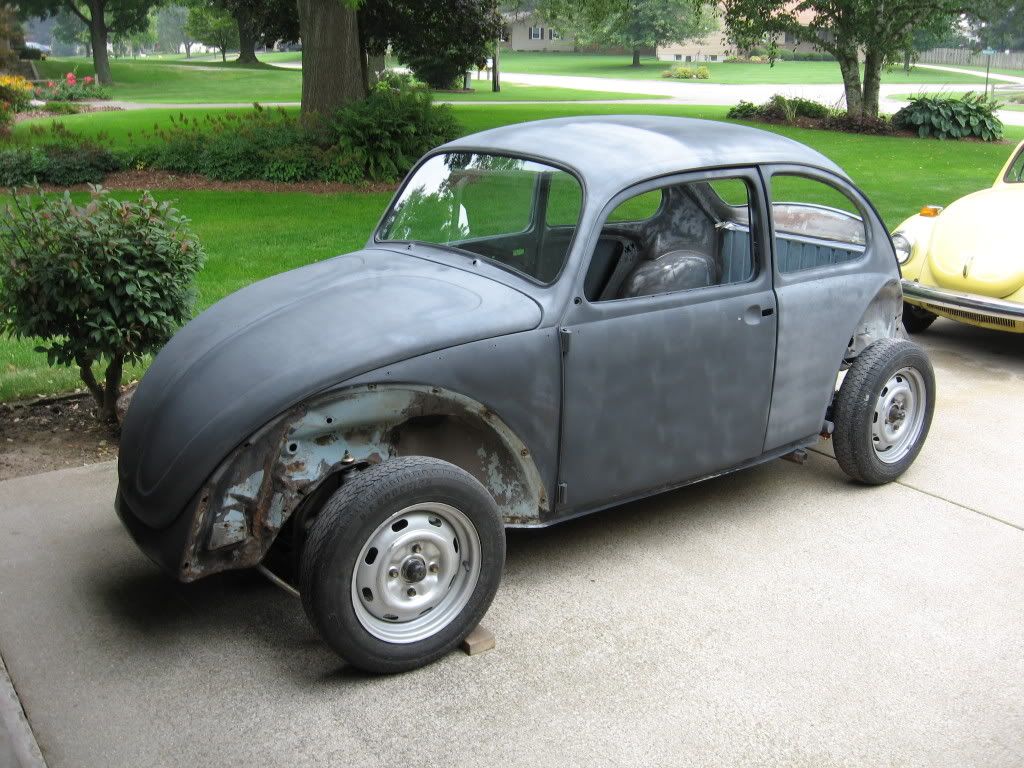 I've spent a lot of time on the interior. There seems to be 3 different kinds of glue, the paint and the seam sealer to deal with on the inside. The most common glue is is hard and can be scraped off, there is something like rubber cement around areas that are on the edge of the headliner that comes off easy with mineral spirits. The rear wheelwells had some gray glue that lacquer thinner will remove, but it is a long process. The project took a turn when I went to clean up the area in front where several different carpet sets appeared to have been installed. I ended up using Zip Strip. This attacked everything including the seam sealer. I decided this was a good thing and went back over the rest of the interior. Here is the current status:  Still got a little work to do to get ready for paint. Motivation has returned. (think it is brought on by sunshine........) |
|
wells
40hp
Posts: 70
Joined: Aug 22, 2008 20:52:06 GMT -5
|
Post by wells on Sept 16, 2008 8:08:06 GMT -5
Nice work Dubfreak1! I like learning tips from you folks on this website, such as how to strip different glues from the interior. Wells
|
|
Southpaw
1600dp
The Green Tin Can
Posts: 1,521
Joined: Sept 9, 2008 5:56:22 GMT -5
|
Post by Southpaw on Sept 16, 2008 8:37:55 GMT -5
Hope you have lots of air flow to get rid of to fumes . But its looking good .
|
|
|
|
Post by dubfreak1 on Sept 16, 2008 9:43:56 GMT -5
Thanks for the kind words guys.
You make a good point southpaw. The no windows situation is probably a must with the Zip Strip. I had the car sitting in the middle of the garage with overhead and service doors open for cross ventilation and used gloves.
|
|
|
|
Post by Dustin on Sept 16, 2008 20:16:15 GMT -5
Great work Rudy, That car is really solid!
|
|
|
|
Post by bren on Sept 16, 2008 20:34:52 GMT -5
Looks good Rudy. I wish my car was that rust free. I like your attention to detail.
|
|
|
|
Post by dubfreak1 on Oct 11, 2008 18:58:03 GMT -5
Its been a while since the last update, but haven't had much to show until now. I finally decided to quit fixing little imperfections that I'd find (the big ones too) and get on with the paint before the warm weather is gone. There were several false starts trying to get the look I'm after, but finally it is close. The only paint work left to do is the Hot Rod Matte Black on the roof, fenders, hoods, and window areas. Here's a pic of the exterior as of last Wednesday: 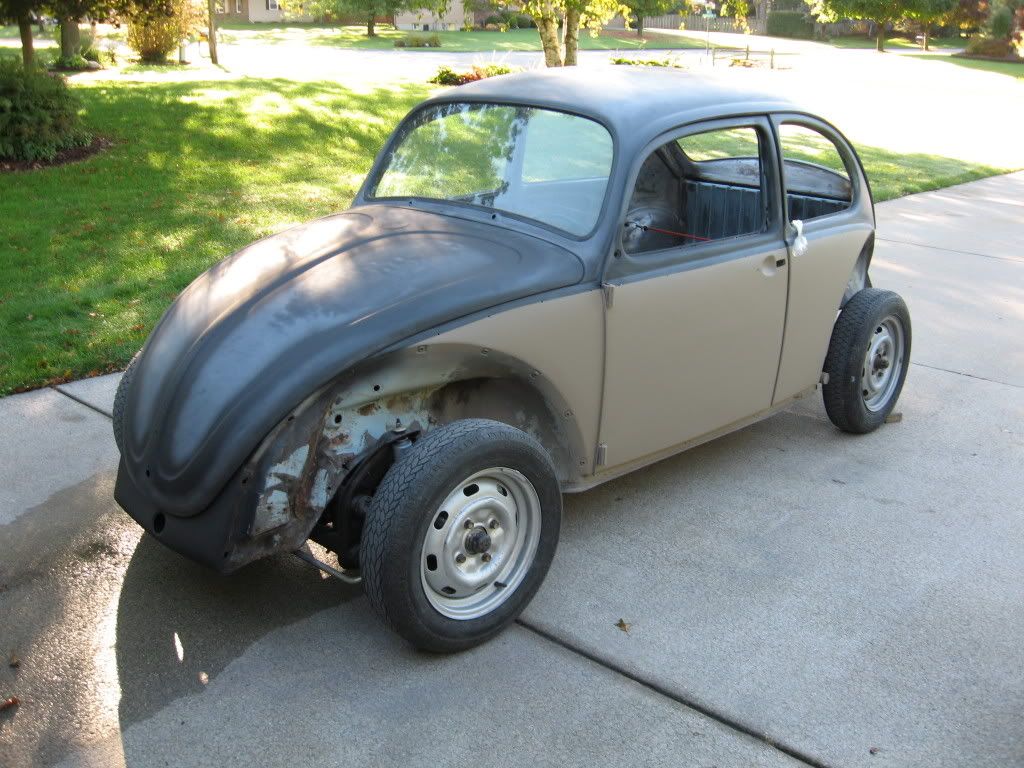 I now have the interior pretty much painted too. The black has a lot more gloss than I wanted, but it is what it is. The black is Matte Clear over lacquer primer. There was sooooo much fog in the car, I really couldn't tell what I was doing and it shows in the results. It almost looks like a rattle can job, but at least it will be a lot more durable:  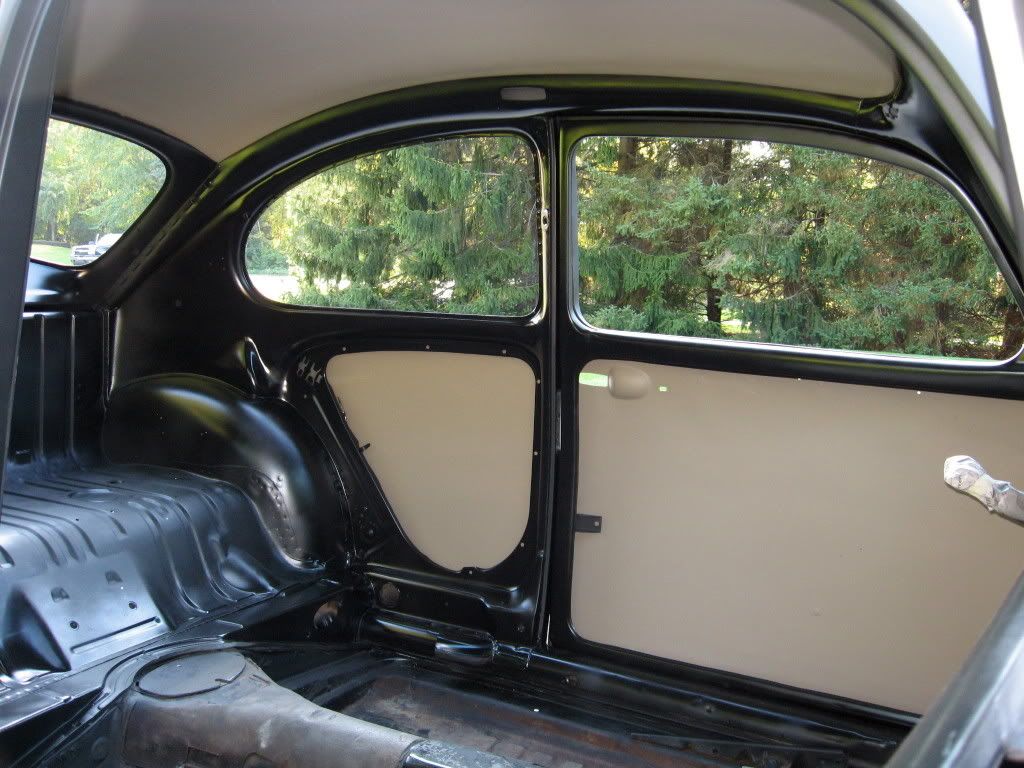 |
|
|
|
Post by bren on Oct 11, 2008 19:56:06 GMT -5
Looks good Rudy. I can't tell from the photo, what is on the inside of the roof? Paint, headliner, or something else?
|
|
|
|
Post by Dustin on Oct 11, 2008 21:15:49 GMT -5
Looks awesome Rudy! I like the two tone look you went with.
|
|
|
|
Post by dubfreak1 on Oct 12, 2008 16:38:02 GMT -5
Thanks for the words of encouragement guys. The interior panels are paint Bren. It is etch and fill urethane primer tinted to get the color I wanted. It has a heavy texture that looks good on the inside. On the exterior, it has been scuffed with scotch-brite and has a matte clear over it to protect the color and make it easier to clean.
|
|
|
|
Post by dubfreak1 on Oct 24, 2008 18:36:05 GMT -5
Well, its finally got all of its different painting done. Here's a shot of just after the Hot Rod Black was sprayed on the exterior: 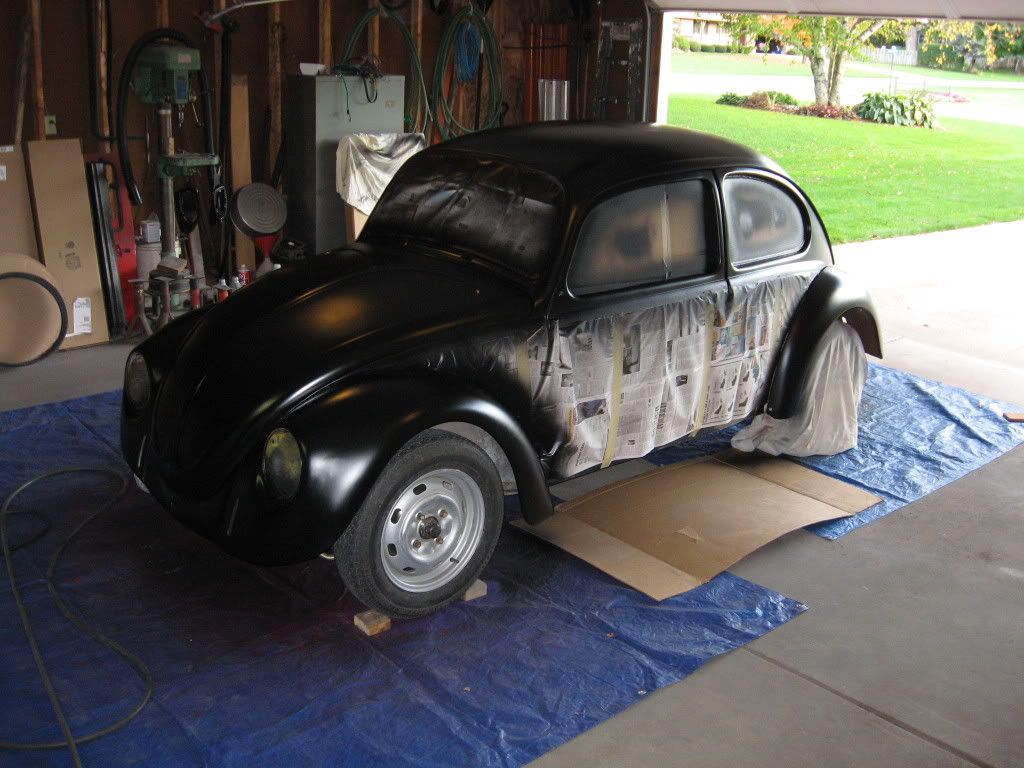 Yesterday I put the putt-putt vroom-vroom thingee in it: 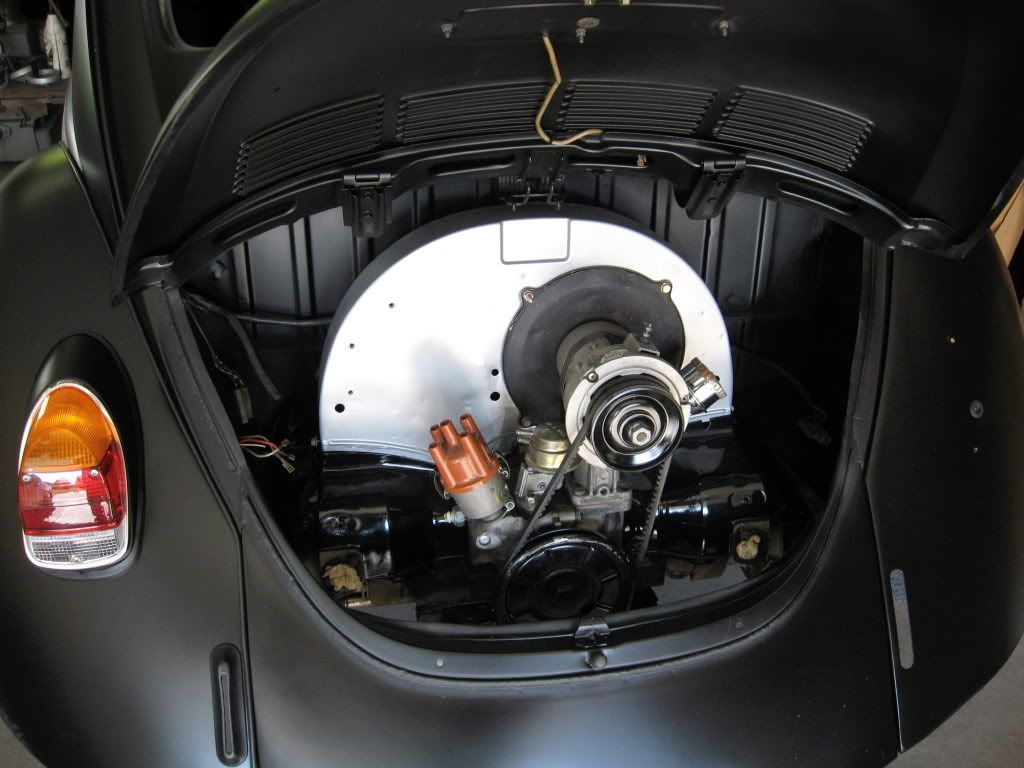 The last shot is on its way to the barn for the winter. This one month project with very little body work ended up being a one day partial project with a bunch of fussing with the appearence stuff. The worst part is that I still clung to the "quick and dirty" when working on the body and it shows. Its a great 10ft car, not too bad at 5ft (if you need glasses and are not wearing them). It probably would look great if I'd gone with flat gray. All in all it will be just fine for its purpose of trying out different mechanical things. I regret not getting done, but have a great start on next year. The season is here for me to dial back on being an airhead and concentrating on being a waterboy. Working on the 90 Jetta tomorrow.................. 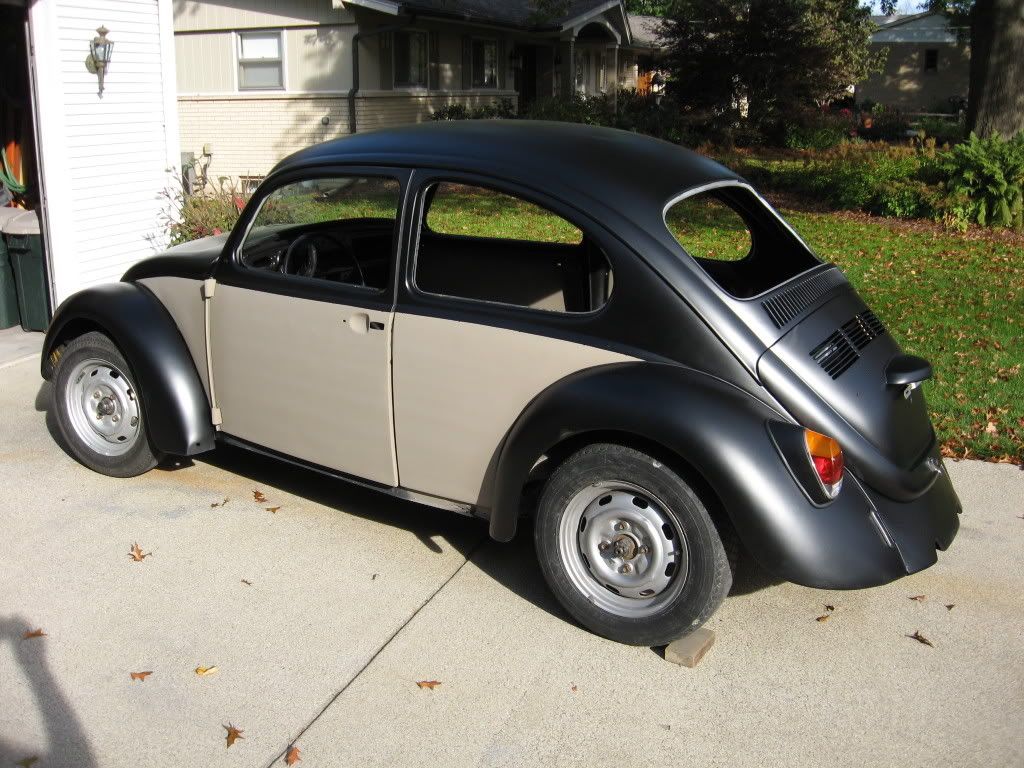 |
|
|
|
Post by Dustin on Oct 24, 2008 18:44:19 GMT -5
Nice work Rudy, I am looking forward to next season so we can see this baby in action.
|
|
jmallen05
1600dp
Posts: 602
Joined: Jul 6, 2008 14:40:12 GMT -5
|
Post by jmallen05 on Oct 24, 2008 19:05:23 GMT -5
That looks real clean, the engine bay looks good too.
jerry
|
|
|
|
Post by Dustin on Apr 4, 2009 0:50:23 GMT -5
Time to get back to work!
|
|
|
|
Post by dubfreak1 on Apr 4, 2009 6:15:19 GMT -5
Well, I thought the same thing but then I saw the weather forecast.........................  I did get some Hoffman Speedster camber adjusters for this car this week and will be back to work on it soon. Hoping to have it running by mid-May, but probably not totally done. |
|