|
|
Post by bren on Oct 5, 2012 17:31:33 GMT -5
Holy Sun Roof!
Wow.
Dynamat that ceiling. You will not regret it (except the purchase price.)
|
|
Gerb
1500sp
Posts: 202
Joined: Jun 23, 2012 6:19:54 GMT -5
|
Post by Gerb on Oct 19, 2012 14:51:41 GMT -5
I haven't done a whole lot to the '74 in a while. Spent what time I've had available stripping parts out of the '73 parts car which I'm hoping to get out of the back yard and to the scrap pile before we have any major snow. I did power wash and degrease the transmission I was planning on using in the '74 today - it's originally out of my '76 vert. After washing it, I found two areas that cause me a little concern. In the photo below, I'm wondering if this is a crack in the case or a casting mark? There is a little flashing left, but I'm just not sure. Comments on this?  Also, on the tale end around the sensor, this goopy stuff was smeared around. I haven't removed it yet, but I'm wondering if anyone has thoughts on this as well?  Thats about it for today. Wish the weather would straighten up some. |
|
Gerb
1500sp
Posts: 202
Joined: Jun 23, 2012 6:19:54 GMT -5
|
Post by Gerb on Oct 23, 2012 17:03:44 GMT -5
I haven't had a chance to scrape off the goop yet, but after consulting several of fellow Goodvolks members in person, it seems the "crack" appears to be more of a casting mark than anything. That's a good thing.
|
|
Gerb
1500sp
Posts: 202
Joined: Jun 23, 2012 6:19:54 GMT -5
|
Post by Gerb on Nov 12, 2012 16:01:55 GMT -5
Haven't done much on the '74, though I've spend quite a bit of time stripping more parts from the '73 parts car. It's getting closer to going to the scrap pile. Anyway, under the gas tank on the '74 has some rust where the tank rails are welded to the dash. Luckily, the '73 didn't have any rust in that area so it was nice enough to lend me a patch panel. I won't need nearly all of this to fix it, but figure it was easier to get too much to start with. Here's what I've got on the '74:  My patch panel from the '73:  |
|
Gerb
1500sp
Posts: 202
Joined: Jun 23, 2012 6:19:54 GMT -5
|
Post by Gerb on Dec 6, 2012 5:59:39 GMT -5
I had the day off yesterday so I took the opportunity to spend some quality time with my sandblaster. The car's not going to get painted this fall so I might as well start getting the motor together.  |
|
|
|
Post by dubfreak1 on Dec 6, 2012 6:29:40 GMT -5
Looking Good!
Do you know what the story is on that lower sled with the hole in it? The hole is probably for thermostat access, but I've never seen a 1pc unit for that side.
|
|
|
|
Post by dunedudex4 on Dec 6, 2012 17:13:12 GMT -5
Rudy yes you have... It is right there in the picture ;D Thanks and where does all that extra tin go?? Dave T ;D
|
|
Gerb
1500sp
Posts: 202
Joined: Jun 23, 2012 6:19:54 GMT -5
|
Post by Gerb on Dec 6, 2012 19:40:26 GMT -5
Is that hole not normally there? It looks factory to me.
|
|
Gerb
1500sp
Posts: 202
Joined: Jun 23, 2012 6:19:54 GMT -5
|
Post by Gerb on Dec 29, 2012 8:06:07 GMT -5
Wow, a little over 5 months to car snow season....I've got a heck of a lot of work to do to make it.
|
|
Gerb
1500sp
Posts: 202
Joined: Jun 23, 2012 6:19:54 GMT -5
|
Post by Gerb on Feb 3, 2013 15:29:23 GMT -5
No real progress to report. Weather hasn't been helpful and my work area (or lack of) isn't helping. I did get the transmission out today to change the back-up light switch. Small gains are better than no gain I guess...
|
|
Gerb
1500sp
Posts: 202
Joined: Jun 23, 2012 6:19:54 GMT -5
|
Post by Gerb on Feb 24, 2013 15:48:34 GMT -5
Engine tin work progress as of today.  |
|
|
|
Post by bren on Feb 24, 2013 17:37:04 GMT -5
Nice!
|
|
Gerb
1500sp
Posts: 202
Joined: Jun 23, 2012 6:19:54 GMT -5
|
Post by Gerb on Mar 13, 2013 20:14:53 GMT -5
Rebuild the distributor - check.....rebuild carb - check.
|
|
Gerb
1500sp
Posts: 202
Joined: Jun 23, 2012 6:19:54 GMT -5
|
Post by Gerb on Mar 16, 2013 21:00:50 GMT -5
Sandblasted my breast plate, pieces that bolt the alt/fan assembly to the shroud, and whatever the brace that's bolted under the rear seat that spans from side to side. Here's my make shift driveway sandblasting cabinet.  |
|
Gerb
1500sp
Posts: 202
Joined: Jun 23, 2012 6:19:54 GMT -5
|
Post by Gerb on Apr 2, 2013 21:07:39 GMT -5
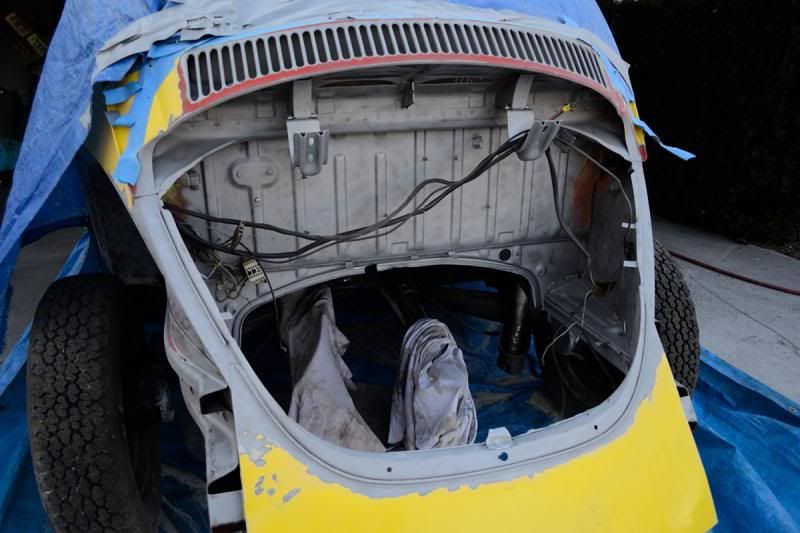
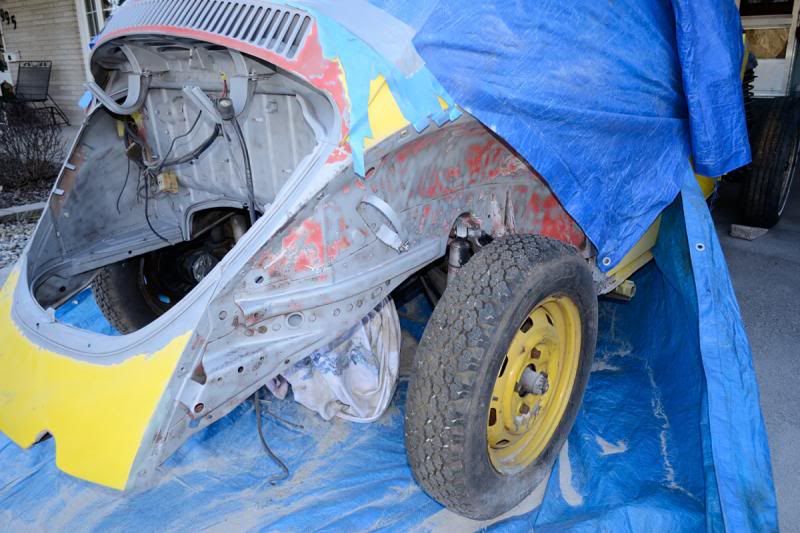
I took this week off to hopefully get some work done on the beetle. Today I was able to spend several hours of quality time with my sandblaster.    So far, everything is on the rear is very solid. Only a few pinholes on the side of the engine bay. African Red is the original color. The rear apron been dinged slightly, but it's still the original one. Planning on working on the trunk and front tomorrow. |
|